|
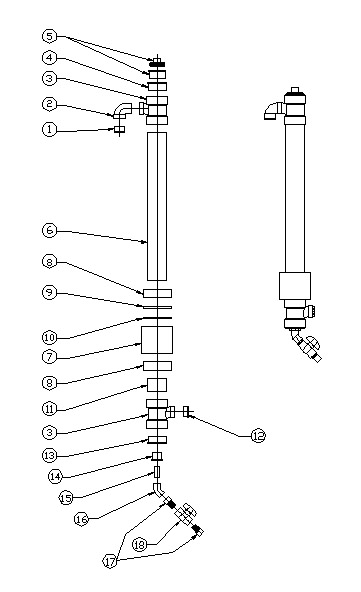
The upper and lower assemblies are pretty strait forward. The only modifications needed would be to trim excess material off various fitting so they fit flush against each other. I also went over every fitting with fine sandpaper to remove sharp corners, edges and any hanging plastic. This is important, as you do not want chips and plastic debri entering your compressor. The assembly drawing and pictures will guide you thru assembly.
Final Assembly & Installation
The AutoCAD assembly drawing pretty much explains part fit up. You can twist the inlet, outlet and drain ports to fit your installation needs. Just remember once you glue it, it is not coming apart. So "fit it twice, glue it once. I would blow out all the sub-assembly parts with compressed air and tape off the inlet & outlet port openings to keep dirt out. Also blowout the 4" PVC pipe, as it is very smooth and shiny on the inside and static charge will make plastic chips, dirt & dust stick to it. Once the dryer is assembled, installation is all that is left. Hang the dryer securely on a wall and plumb up your supply and compressor lines. The only things to keep in mind are to pour the 2 pounds of ceramic marbles in first. Then pour in the Hydro-Lith "E" next. Fill the column up to the outlet port. I would use gloves when handling the Hydro-Lith "E". It may look like salt tablets, but its not. It attracts water vapor like a sponge. When the column is full. You then need to install the 3" PVC screw in plug. Coat the threads liberally with Teflon sealant. Put it on the plug threads and receiving threads. Don't be sparing either. More is better. I used a larg creaent wrench to turn the plug's square top. When finished, bleed the system of air and you are done.
Maintenance
The only maintenance I perform is to crack the drain valve on the coalescing filter and dryers once a week. I also top off the Hydro-Lith "E" once a month. Well I hope you found this adventure informative. Just another story in the continuing saga of CNG.
|